
Have you ever wondered why while others are satisfied with the adhesive tape that they chose, you are left with no idea as to why the objects that you mounted keep hitting the floor back?
While it could be the product's fault, you really can't help but wonder why it works wonders to others but doesn't seem to cooperate with you. Statistics show that more often than not, satisfaction does not only depend on the product's quality but also on the proper usage and installation of the item.
As such, we are here to give you sure-fire tips in ensuring that the power of your chosen adhesive tape lasts in a long term basis. Go ahead and read on to know these useful steps.
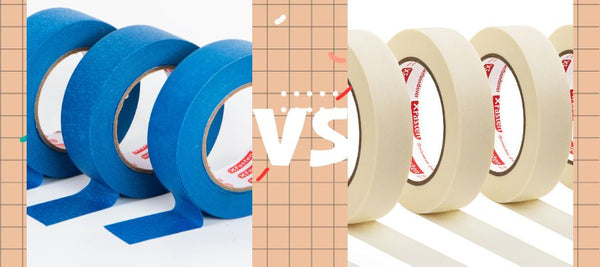
Make Sure That You Are Using The Right Adhesive For The Job
Nobody brings a knife to a gunfight. The same is true for home improvement and office design projects. If you are to organize your things or do something very important using an adhesive tape, then the right one should be chosen for the job. It is, therefore, a prerequisite that you choose the right tool for your materials.
Make sure that the appropriate adhesive tape with the right weight bearing capacity and specification is being used for your project for an ideal outcome. No matter what you do, if the choice of the tape was wrong from the onset, then you will never get a satisfactory result and strength in terms of adhesion. We have recently made a comprehensive guide as to which tapes are ideal for specific purposes and material choices so you may want to check that out here.
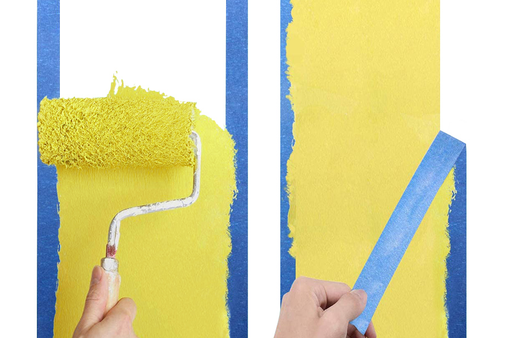
Clean The Surface Thoroughly
Lint, dust, grime, and moisture all radically decrease the adhesion of a tape. Lint and oil lessen the friction between the adhesive tape and the surface. Therefore, it is necessary for you to clean the surface thoroughly to ensure maximum bonding strength. In order to do this, simply wipe the surface with a wet cloth or an alcohol solution then let it dry by wiping it again with a dry rug. Make sure that no moisture is present on the surface.
Be Generous On The Amount
A common misconception among many is the weight bearing capacity of an adhesive tape. If a tape claims to have a capacity of 5 pounds per square inch, it doesn't automatically mean that you would only need to use 1 inch of tape for a 5-pound object.
Weight bearing capacity limits are determined through a laboratory test which means that the experiment is done under ideal conditions and that a 1 cubic inch box was also used. This means that in the real world, the environment would be less ideal and that the objects which you would be attaching are generally larger.
It isn't mass that solely dictates the amount of tape that should be applied, rather, the object's surface area also clearly affects the adhesive's success. Hence, as a general rule, the amount and length of strips that should be applied is directly proportional not only to the object's mass but also to its size. To be sure, it is best to maximize the surface area of application, which is to say, applying as much tape as you can in order to provide a clear buffer for the tape's adhesive strength.
Right Application Pattern
Also, be sure that you arrange the tapes in a way in which it can counter any and all countervailing forces that it should resist. This means that it would be best to not only position the tapes in one straight line. The best pattern is to cover the edges of the object with the tape and also applying some strips in the middle forming an "X-pattern" with the adhesive. Varying the direction of the tape strips and installing them at an angle are ideal patterns that will ensure maximum bonding strength.
Apply Pressure
After installing and mounting the object with the adhesive tape, it would be best to apply some pressure to the object towards the surface- pressing all possible areas where the tape was applied. If possible, it would also be ideal to use a rubber hammer, a roller, or any cylindrical canister to squeegee any air gaps that may exist in between the tape and the surface.
These air gaps, which can be removed by applying some pressure, can accommodate air bubbles or moisture which will lessen the tape's strength over time. Hence, it is crucial to eliminate them.
Let it Rest and Settle
After all these steps above have been met, it is equally important to let the object and adhesive rest before subjecting them to any extensive force. Letting the adhesive rest and set would increase its rigidity and structural integrity over time.
Wrapping It Up
The key towards making the adhesive stay on a long term basis lies on following the instructions given by the manufacturer and also by following the steps above. Yes, they may be complex, time-consuming and unnecessary at first glance- but following them can significantly increase your project's success.
If you have any questions regarding this topic, please don't hesitate to leave a comment below or contact us through our email, customerservice@apipema.com. Good luck on your upcoming projects!

Comments
11 Comments
<p>My project was securing an area rug to the whole-room carpet, to prevent any more stubbed-toe inducing curls along the edge of the rug. Here’s how I was able to remove the backing from carpet tape without too much trouble:</p> <p>1 As the tape unrolled, the underside was sticky and I stuck the tape to the area rug with the backing still on. (Sorry if that sounds like Captain Obvious … it wasn’t obvious to me when I started.)</p> <p>2 I used a roller to secure the tape to the area rug as tightly as possible. (What kind of roller? A bottle of wine.) (Unopened.)</p> <p>3 Then I just used a fingernail to scratch at a corner of the tape until a little something curled up and away from the carpet. That little something was almost always just the backing, but sometimes the adhesive came with it, In that case I wine-bottled that corner back down and tried another.</p> <p>4 When the curled-up little something was only the backing, I picked at it with thumbnail and pointer-finger-nail until I got a grip, then pulled it away from the carpet. (the slower the better, I was to learn.)</p> <p>5 The only time I had any trouble with how the backing came off was when I pulled it too hard and/or at too much of an angle, which left behind some backing while some backing tore away from what was left behind. (Like when you’re starting a roll of toilet paper and it doesn’t start evenly.) When that happened, I scratched and picked at a corner at the other end of the tape, then pulled that backing toward the uneven place in the middle.</p> <p>Hope that helps. I’ll toast all of you when I open that bottle of wine at dinner tonight.</p>
<p>How do you recomend removing the red backing had to use an xacto knife very dangerous & had to do.</p>
<p>I used an exacto knife on the edge and finally could peel it off. I peeled a 2" section, then laid it down in placed and peeled. not easy, but need a pin point to find an edge. hope this helps.</p>
<p>How do I remove the backing? I see this is a common question. I too, cannot remove the backing. Came to your website for tips with no answer in sight.</p>
<p>Is the tape waterproof?</p>
<p>Is the tape waterproof?</p>
<p>Is the tape waterproof?</p>
<p>How do you remove the backing to start to use the double stick tape in a dispenser? This is a common question here and no answer in sight. I’ve found the tape useless as it can’t be started. And I’ve tried every possible approach. Very dissatisfied.</p>
<p>How do I remove the backing? Why don’t you include this in your general directions?</p>
<p>Can you (Xfasten) provide a pro hack on how to neatly remove the red backing of the fantastic mounting tape without gubering up the tape at the start of the peel?</p>