
You spent all weekend painting your living room. The color is perfect. But when you peel back the tape — there it is: a jagged, blurry edge where crisp should have been. Paint bleed. It's one of the most frustrating moments in any DIY project, and it happens to experienced painters and beginners alike.
Getting clean paint lines is, at its core, a tape problem. Painter's tape is designed for this exact job, but applying it correctly — and choosing the right width for the right surface — makes all the difference between a professional-looking result and a do-over.
Here's what most guides get wrong: they focus on the painting itself. The real secret to sharp, clean lines is 100% in the preparation. Get the prep right, and the paint does the rest.
In this guide, you'll learn how to prep your surface before taping, the right way to apply painter's tape so it seals completely, which width to use for different projects, a pro trick with a sealing coat that almost no DIY guides mention, and how to remove tape so you never tear the edge.
Why Paint Bleeds Under Tape (And How to Stop It)
Paint bleeds when tape doesn't seal flat against the surface. This sounds simple, but the cause is almost always one of three things: the surface has dust, texture, or oils that break the tape's adhesion; the tape is pressed down unevenly, leaving micro-gaps along the edge; or paint is applied too heavily in a single coat, forcing it under the tape by sheer volume.
According to painting industry data, surface prep failures are responsible for more than 80% of adhesion-related paint defects — including bleed-through along tape lines. The tape itself is rarely the problem. The surface and application technique almost always are.
The fix starts before you even open the paint can. Wipe down the surface you're taping along with a slightly damp cloth to remove dust and skin oils. On glossy trim or baseboards, a light scuff with 220-grit sandpaper gives the tape something to grip. Let the surface dry completely — even a few minutes of residual moisture can weaken adhesion.
Once your surface is clean and dry, you're ready for tape that actually holds.
Choosing the Right Width of Painter's Tape
The width of your painter's tape should match the scale of your project. Using a narrow tape on wide trim wastes time and increases the risk of paint drifting onto the protected surface. Using a wide tape in tight spaces like window muntins makes precise placement nearly impossible.
Here's a practical guide to width selection:
¾-inch tape works best for fine detail work — window panes, decorative molding, narrow trim. The smaller footprint gives you precise control in tight spaces where a wider tape would bunch and gap.
1-inch tape is your everyday workhorse. It handles most interior trim, door frames, and general wall-ceiling transitions where you need a clean line without excess bulk.
1.5-inch to 2-inch tape is ideal for baseboards, wide crown molding, and any surface where you're protecting a larger area. The extra width means more of the surface is shielded from accidental brush drift, and there's more tape edge pressing flat on the wall.
2-inch and wider tape shines on large flat surfaces — masking off cabinets during refinishing, protecting floors near baseboards, or taping off entire wall sections during two-tone paint projects.
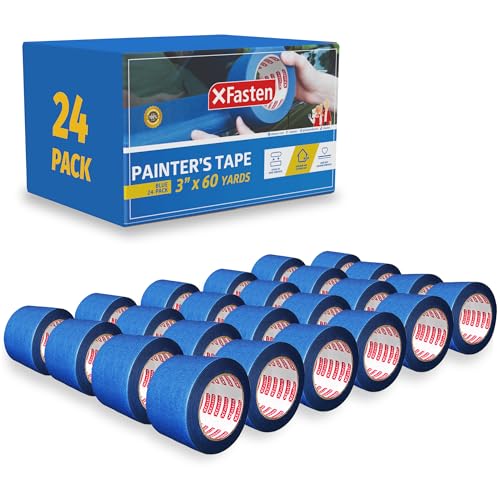
XFasten Blue Painter's Tape comes in multiple widths precisely for this reason. Browse the full painter's tape lineup at xfasten.com to match the right roll to your project before you start.
The Right Way to Apply Painter's Tape
Most DIYers apply tape too quickly. Take your time here — this is where clean lines are won or lost.
Step 1 — Anchor one end and unroll slowly. Don't pull a long strip and then press it down. Instead, anchor the tape at one corner, then unroll a few inches at a time while pressing the edge down with your fingertip as you go. This prevents the tape from stretching, which causes it to pull away from the wall and curl after application.
Step 2 — Press the critical edge firmly. The paint-facing edge of the tape — the inner edge closest to where you'll be painting — needs to be pressed completely flat. Run your thumbnail along this edge firmly, or use a putty knife with a soft cloth wrapped around the blade. Any lift along this edge is a highway for paint to sneak under.
Step 3 — Work in manageable lengths. On long runs like baseboards, apply tape in two- to three-foot sections rather than one continuous strip. Shorter sections are easier to keep straight and flat, especially on surfaces that aren't perfectly even.
Step 4 — Use the sealing coat trick. This is the single best trick professional painters use that most weekend DIYers never hear about: after your tape is applied, brush a thin coat of the same color you're protecting along the tape edge before you switch to the new color. Let it dry fully. This seals any micro-gaps with the original color, so if paint does bleed, it's invisible. Then apply your new color on top. The result is a razor-sharp line.
Pro Tips for Specific Surfaces
Textured walls: Standard painter's tape struggles on heavily textured surfaces like orange peel or knockdown because it can't conform to every valley in the texture. Press the tape down extra firmly along the entire edge, and use the sealing coat trick described above. It's essential on texture, not optional.
Trim and baseboards: Always tape against the wall, not against the trim. Apply tape to the wall side so the edge sits flush on the wall surface. This gives you a clean line on the wall and lets you feather paint onto the trim naturally without a harsh edge.
Ceilings: Use a wider tape (at least 1.5 inches) and apply it to the ceiling, leaving just the bottom edge exposed. Keep your brush angled up into the ceiling junction. Work in sections of no more than four feet at a time to maintain a steady hand.
Glass and tile: These non-porous surfaces can actually be too smooth for tape to bond well over time. On a hot day, or if a project extends over several days, check tape adhesion every 24 hours and re-press any lifting edges. Don't leave painter's tape on glass or tile for more than 48 hours in warm conditions.
When to Remove Painter's Tape (And How to Do It Right)
Timing your removal is as important as your application.
Remove tape while the paint is still slightly tacky — not wet, not fully dry. Fully wet paint smears when you pull tape. Fully dry paint can crack and chip along the tape line, especially with thicker latex formulas. The sweet spot is about 30–60 minutes after your final coat, when the paint has set but not hardened.
Pull the tape back at a 45-degree angle, not straight up and not parallel to the wall. Pulling at 45 degrees keeps the tension on the tape itself rather than on the paint film, which dramatically reduces chipping and tearing.
If the tape has dried completely before you get to it — it happens — score lightly along the tape edge with a utility knife before pulling. This breaks the paint film cleanly at the line rather than tearing it.
Paint Smarter, Not Harder
Getting perfectly clean paint lines isn't about buying the most expensive paint or having years of experience. It's about following a process: clean the surface, choose the right tape width, press the edge completely flat, seal the edge before painting, and pull the tape at the right angle at the right time.
Every step is achievable by any DIYer on any budget. With XFasten Blue Painter's Tape — available in widths from ¾ inch to 2 inches and beyond — you have a tool that's up to the job on every surface in your home.
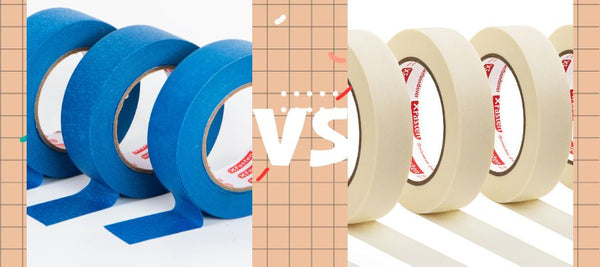
Ready to tackle your next painting project? Shop XFasten Blue Painter's Tape and get every roll you need before you start. And if you're painting over freshly repaired walls, don't miss our guide on Painter's Tape vs. Masking Tape: What's the Real Difference? — it'll help you choose the right tape for every surface in your project.


Comments
2 Comments
<p>Good day to you all in this site, my name is Maris Paul I want to write about my great Doc who put the smile on my face again I was just hopeless when my family doctor told me there is no cure to this sickness HSV2, this horrible sickness really stress me out anytime I have outbreak well I very happy to have a normal life again since I meet DR.AFRID who pull me out from this bondage, I was searching for cure in the internet when I found out about this doctor on a lady post that she was cured by him, I email him for help also and explain everything to him, then I was told by him there is cure to HSV 2 and I was so happy deep inside my heart, I requested for medicine that was how he sent it down to me with UPS and I have the cure within 4day, I only take the herbal medicine for just 2 week according to the doc instructed, after everything I book for appointment for test I was so happy when I have my result I was completely cured that is why I am writing this out for people to know there is cure to this sickness you can also email the doctor through DRAFRIDHERBALHOME@GMAIL.COM or visit His website to know more https://afred-natural-recipe.b12sites.com/index#home</p>
<p>Good day to you all in this site, my name is Maris Paul I want to write about my great Doc who put the smile on my face again I was just hopeless when my family doctor told me there is no cure to this sickness HSV2, this horrible sickness really stress me out anytime I have outbreak well I very happy to have a normal life again since I meet DR.AFRID who pull me out from this bondage, I was searching for cure in the internet when I found out about this doctor on a lady post that she was cured by him, I email him for help also and explain everything to him, then I was told by him there is cure to HSV 2 and I was so happy deep inside my heart, I requested for medicine that was how he sent it down to me with UPS and I have the cure within 4day, I only take the herbal medicine for just 2 week according to the doc instructed, after everything I book for appointment for test I was so happy when I have my result I was completely cured that is why I am writing this out for people to know there is cure to this sickness you can also email the doctor through DRAFRIDHERBALHOME@GMAIL.COM or visit His website to know more https://afred-natural-recipe.b12sites.com/index#home</p>